
Unlock the Secret to Perfect PETG Prints with the Right Temperature!
When it comes to 3D printing, the difference between a successful project and a frustrating failure often boils down to one crucial factor: temperature. PETG filament, known for its durability and versatility, is becoming increasingly popular among both hobbyists and professionals. This glycol-modified version of PET (Polyethylene Terephthalate) offers a balance between the ease of printing found in PLA and the strength associated with ABS. However, achieving high-quality prints with PETG filament temperature requires a keen understanding of optimal temperature settings. Getting these settings right can make the difference between a stunning print and one riddled with defects.
Understanding PETG Filament
PETG filament boasts several properties that make it a favorite in the 3D printing community. Its excellent layer adhesion and low shrinkage mean that prints are less likely to warp, a common issue with other materials like ABS. PETG also offers a great balance of flexibility and strength, making it suitable for a variety of applications—from prototypes to functional parts. The melting point of PETG typically ranges from 230°C to 250°C, and during the printing process, it exhibits a unique behavior; it can be prone to stringing if not managed properly. A friend of mine recently transitioned to using PETG for his projects and was amazed by how easy it was to print detailed models once he understood its properties.
Importance of Temperature Control
Temperature control is paramount when working with PETG filament. If the nozzle temperature is too low, the filament may not melt adequately, leading to poor layer adhesion and print failure. Conversely, an excessively high temperature can result in stringing, where thin strands of filament are left hanging between parts of the print. Additionally, the bed temperature plays a crucial role in preventing warping and ensuring that the first layers stick well. I remember a time when a friend was printing a large model and had set the bed temperature too low; the corners started lifting, and the entire print failed. Such experiences underscore the necessity of fine-tuning temperature settings for optimal results.
Optimal Temperature Settings for PETG
The recommended temperature settings for printing with PETG filament usually fall within a nozzle temperature range of 230°C to 250°C and a bed temperature of 70°C to 80°C. However, these settings can vary based on the specific 3D printer used and the environmental conditions where printing takes place. For instance, in a colder room, increasing the bed temperature slightly may help with adhesion. Moreover, some printers may require slight adjustments to the nozzle temperature to account for hardware differences. Experimentation is key; my experience has shown that making small incremental changes can lead to significant improvements in print quality.
Testing and Adjusting Temperatures
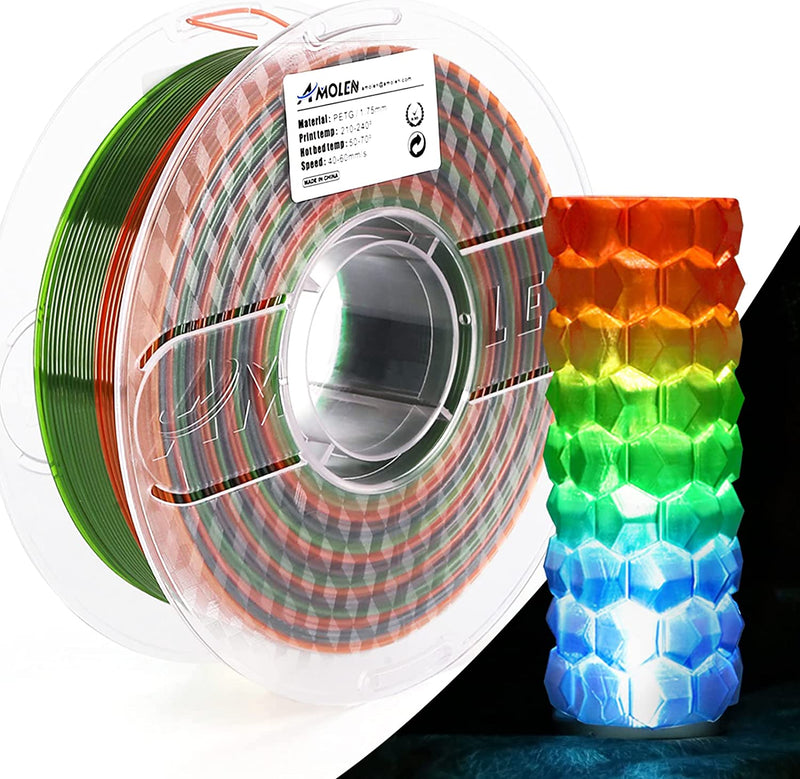
Finding the optimal temperature settings for PETG printing can involve a bit of trial and error. One effective method is to print temperature towers, which are designed to test various temperature settings in a single print. By observing the results, you can determine the sweet spot for your specific setup. Additionally, adjusting the temperature in small increments and printing small test pieces can lead to better results. It's also helpful to keep a log of the settings used for each print, noting any issues encountered and how they were resolved. This practice has helped many in my circle refine their printing processes.
Mastering PETG Temperature for Impressive Prints
In conclusion, understanding and controlling the temperature settings when printing with PETG filament is essential for achieving high-quality prints. From avoiding issues like stringing and warping to ensuring good layer adhesion, the right temperature can elevate your 3D printing experience. I encourage readers to experiment with different settings and document their findings. With patience and practice, you too can unlock the potential of PETG filament and produce stunning 3D prints that stand the test of time.